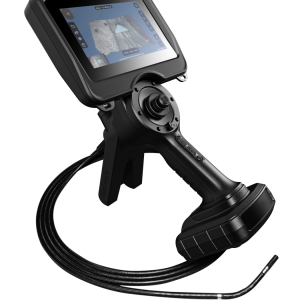
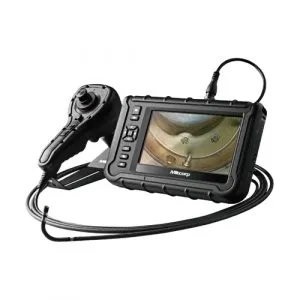
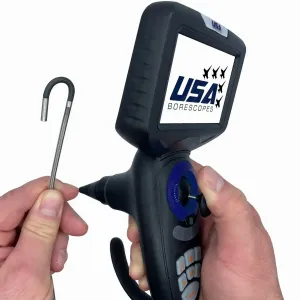
When you need to inspect the inside of an engine, turbine, pipe, or casting, access is usually the biggest challenge. You can’t always disassemble equipment just to take a look, and even when you can see the problem, you still need a way to quantify it. That’s where a measuring borescope comes in, helping inspectors move from “there’s a crack” to “the crack is this long, this wide, and appears to be progressing.”
For teams doing remote visual inspection (RVI), tools like those available through USA Borescopes support inspections that are faster, more repeatable, and better documented, without turning every internal check into a teardown.
What Makes a Borescope a Measuring Borescope
A standard borescope (or videoscope) is primarily a visual tool: it lets you see internal areas with a camera at the end of a flexible or rigid probe. A measuring borescope adds something critical: measurement capability, so the inspector can capture dimensions of features inside tight or inaccessible spaces.
That difference matters because many maintenance and quality decisions depend on numbers, not impressions. A visual-only inspection might reveal pitting or a dent, but measurement helps determine severity, compare against allowable limits, and track change over time. Measuring borescopes are commonly used in aviation and aerospace, power generation, manufacturing, automotive, oil and gas, and other industries where internal defects must be documented precisely and consistently.
The Main Parts That Affect Measurement Accuracy
Not every measuring borescope performs the same way. Measurement accuracy and repeatability depend on how the system is built and how it’s used. Here are the components that tend to matter most.
Probe diameter, length, and articulation
- The diameter determines where the scope can physically fit. Smaller diameters access tighter pathways, but can sometimes limit lighting or sensor size.
- Working length must match the distance to the inspection area. Too short and you can’t reach; too long and stability can become harder.
- Articulation (often 2-way or 4-way, sometimes joystick-controlled) helps the operator position the camera head precisely. Stable positioning is a major factor in getting reliable measurements.
Camera head and illumination
Measurements depend on what the camera can see clearly:
- Resolution and clarity influence your ability to define edges and features accurately.
- Lighting affects glare, shadowing, and contrast, especially on reflective or curved surfaces.
- Field of view and depth of field change how objects appear at different distances. A system may measure best within a certain distance range where geometry and focus are optimized.
Display, software, and reporting tools
A measuring borescope is as much a software system as it is a camera. The interface typically lets inspectors freeze a frame, place cursors or points on features, and calculate dimensions. Just as important: it should help teams save annotated images, store measurement results, and generate reports that are easy to share and audit.
How Measuring Borescopes Create Measurements
At a high level, a measuring borescope turns images into numbers by combining optics, calibration, and geometry. The exact method depends on the system, but most follow a similar measurement pipeline:
- Calibration/system reference: The device accounts for the camera optics and measurement model it uses.
- Image capture: The inspector stabilizes the view and captures a still image or uses a freeze frame.
- Feature selection: The inspector chooses points/edges on the screen using measurement cursors.
- Computation: The software calculates real-world dimensions based on the measurement method and the known properties of the camera system.
Two practical concepts show up again and again:
- Distance matters: A feature viewed too close or too far may fall outside the scope’s best measurement range.
- Angle matters: If the camera is angled sharply relative to a surface, edges can distort, and measurements can be less reliable.
Stereo triangulation basics
Many measuring systems use a form of stereo vision, capturing the target from two slightly different perspectives. With two views, the system can infer depth, similar to how human vision perceives distance. Once depth is estimated, the software can compute dimensions between points on the surface.
In practice, stereo-based measuring borescopes often work best when the area of interest is well-lit, in focus, and within the recommended measurement distance. When used correctly, they can provide fast, repeatable measurements for common defect types.
3D measurement approaches
Some advanced systems use 3D measurement techniques to create a more complete representation of the surface being inspected. Instead of calculating a single distance between two points, a 3D approach can generate depth information across an area; effectively building a surface model from which multiple measurements can be derived.
The benefit is detail: inspectors can measure features like depth, contour changes, or complex geometry with more context. The tradeoff is that 3D measurement often requires careful technique, stable probe positioning, proper lighting, and capturing within the ideal range, so the model is clean and usable.
Measurement tools in the user interface
Most measuring borescopes provide a set of measurement modes. While names vary, these common tools show up frequently:
- Point-to-point (length): Measure the distance between two selected points.
- Depth/step: Estimate how deep a pit or depression is relative to surrounding material.
- Area: Outline a region and calculate its area (useful for corrosion patches or surface damage zones).
- Multi-segment and feature-based tools: For more complex shapes or when measuring along a curve.
A good workflow makes it easy to save the image with measurement overlays and notes, so another technician can review the exact feature that was measured.
Step-by-Step: Taking a Measurement During an Inspection

Even the best measuring borescope benefits from a consistent process. Here’s a practical approach technicians often use to reduce error and improve repeatability:
- Prepare the scope and target path
Confirm that the probe diameter and length fit the access route. If the environment allows, remove loose debris that could obscure the view. - Stabilize the view
Move the probe into position and use articulation to square up the camera to the feature. Avoid measuring while the image is drifting or shaking. - Optimize lighting and focus
Adjust illumination to reduce glare. If the surface is reflective, small changes in angle can dramatically improve the visibility of edges. - Freeze the frame and place measurement points
Use the device’s measurement mode (point-to-point, depth, area, etc.) and carefully place cursors on clear, repeatable edges. - Capture documentation
Save stills and/or video clips with notes. If your workflow involves standard reporting, record the location and context (component section, stage, orientation).
If you’re thinking through real inspection scenarios, engines, turbines, piping, and castings, reviewing common use cases can help clarify what measurement capability you actually need. The examples on the USA Borescopes applications page are a helpful starting point for mapping tool features to real-world inspection tasks.
The right measuring borescope is the one that matches your access constraints, inspection targets, and documentation requirements, without overcomplicating your workflow.
Match the scope to the access problem
Start with the basics:
- Probe diameter for the tightest pathway you must pass through
- Working length for the farthest inspection point you must reach
- Articulation control for your environment (bench work vs field work)
Choose measurement capability based on what you need to prove
If your inspections require consistent tracking of defect size, especially in regulated or high-consequence environments, measurement and reporting features become just as important as image quality. Consider how often you’ll need:
- Depth measurements vs simple length measurements
- Area measurements (corrosion patches, coating loss zones)
- Repeatable before/after comparisons across time
To compare options side-by-side, it’s easiest to start with a curated selection of equipment. Browsing the USA Borescopes products page can help narrow choices based on probe size, articulation, and measurement features.
Consider your industry’s workflow.
Different industries emphasize different needs: speed, documentation, traceability, ruggedness, or specialized accessories. If you’re aligning a scope purchase to a particular environment (aviation, power, manufacturing, etc.), exploring how inspections differ by sector can be useful. The overview on USA Borescopes industries is a good way to sanity-check requirements before you commit to a system.
Choosing the Right Measuring Borescope for Your Job

A measuring borescope is designed for more than visibility; it’s built for decision-making. By combining calibrated imaging with measurement tools, it helps technicians quantify internal defects, document findings clearly, and reduce the subjectivity that can creep into visual-only inspections. For teams that want help selecting equipment, supporting an inspection program, or keeping tools operational over time, USA Borescopes is positioned as a practical resource, especially when paired with options like inspection support and service. To explore available support offerings, see services, and when you’re ready to discuss your specific inspection needs, contact them today.
About The Author
The author is an experienced inspection professional with a background in remote visual inspection technologies. They have spent years working with borescopes and videoscopes across industrial and mechanical environments, helping teams understand how measurement tools improve inspection accuracy, documentation, and maintenance decision-making.
read more : How a Google Maps Scraper Supports Location Focused Business Decisions?
